What is a Histogram?
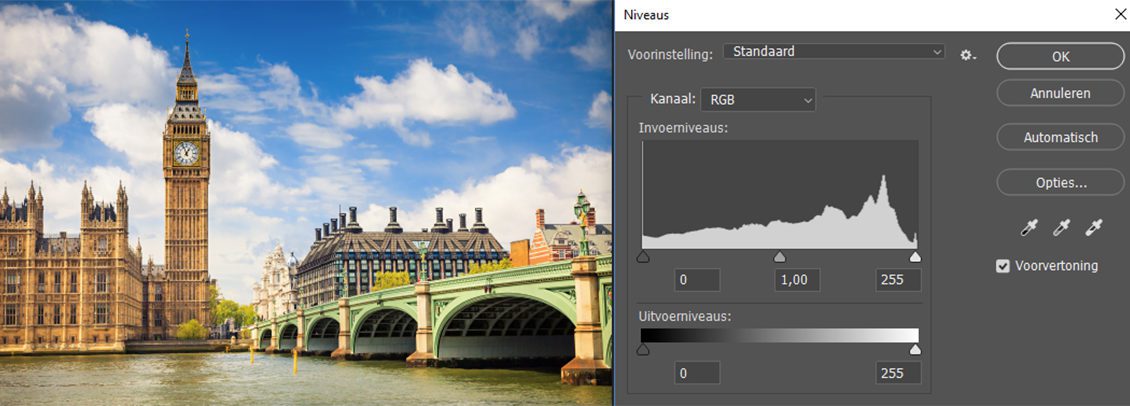
A histogram is a graph that shows how the brightness tones in your photo are distributed. It displays the number of pixels for each tone value (from black to white). Think of it as a visual light meter that helps you judge whether your photo is properly exposed.
Most cameras (like Canon or Nikon) let you enable the histogram via the ‘Info’ button or in the display settings. In photo-editing software such as Photoshop or Lightroom, you’ll typically find the histogram above your image or in the ‘Levels’ module.
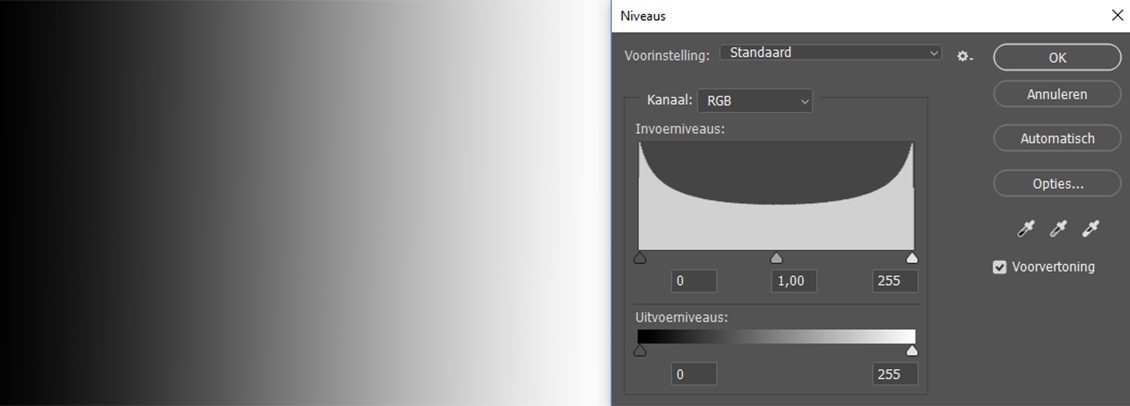
A digital photo usually uses an 8‑bit colour channel, meaning there are 256 possible brightness levels. These are plotted on the x‑axis from 0 (pure black) to 255 (pure white). The y‑axis shows how many pixels fall into each category.

Why is the histogram useful?
On your camera’s LCD screen, a photo can look brighter or darker than it actually is due to ambient light, screen brightness, or viewing angle. The histogram, however, doesn’t lie: it objectively shows the tonal distribution in your image. You can use it to check if your photo is overexposed, underexposed, or well-balanced, helping you avoid losing important details in shadows or highlights. When shooting RAW, you can often recover some detail in post‑processing, but it’s always better to prevent clipping in the first place. The histogram serves as a helpful guideline—especially for high‑contrast scenes like snowy landscapes, night shots, or portraits against bright skies.
Different histogram shapes
There’s no “perfect histogram”—its shape depends entirely on the photo. That said, you may recognize a few common patterns:
Evenly centred: a peak in the middle indicates a well‑balanced exposure.
Skewed left: many dark tones—common in night shots or dim interiors.
Skewed right: many bright tones—think snow scenes or bright backgrounds.
More important than the shape is whether data is pressed against the edges. If the histogram touches the left edge, you risk clipping shadow detail. If it touches the right, highlights may be overblown.

The subject and the setting comprise divergent brightnesses: tonal value distribution will be relatively equal.
Using the histogram while shooting (Canon/Nikon)
On both Canon and Nikon cameras, you can view the histogram during or after shooting. Turn it on in the settings or press ‘Info’ while reviewing your shot. Check that the graph doesn’t touch the edges, unless you intentionally want that effect. You can then adjust exposure on the spot—by changing shutter speed or using exposure compensation.
Using the histogram in post‑processing
In tools like Photoshop or Lightroom, the histogram helps you edit more precisely. The sliders underneath let you control:
Black point (left): deepens the darkest tones.
White point (right): brightens the highlights.
Midtones (middle): adjusts overall brightness.
Be careful not to push data outside the histogram’s range—unless you want a specific artistic effect.
The pros and cons of the histogram
A histogram is a very useful aid, but it’s not the holy grail. It only shows brightness distribution—not colour or mood. Use it to support your judgment, but also trust your eyes and creative intuition.
Indeed, the histogram can be a helpful tool both on location and during editing. Yet if you want precise on‑site exposure information, a light meter is your best bet. And to accurately evaluate your final image, make sure your monitor is calibrated.


