
What is Ultrachrome K4?
Ultrachrome K4 is an advanced ink technology developed by Epson, a major supplier in the world of printing and imaging solutions. Ultrachrome K4 is specifically designed for professional inkjet printers and represents a significant leap forward in print quality, color accuracy, and sets new standards in this industry.
The “K4” in Ultrachrome K4 refers to the four levels of black ink used in this modern ink system. The ink set consists of four different types of black ink. These black tones are crucial for smooth transitions, finer details, and a wider tonal range.
One of the notable features of Ultrachrome K4 is its longer lifespan, high quality, exceptional sharpness, and resistance to fading. The quality of Ultrachrome K4 prints ensures that memorable memories and valuable images remain vibrant and intact for future generations.
This black and white paper allows (professional) photographers, artists, and graphic designers to faithfully reproduce their vision in print and capture even the most subtle nuances of their work.
Black or white
When you use black ink alone it’s still possible to print the intermediary grey values with an inkjet printer. In this instance you use a method deriving from standard printing technology: rasters are created that comprise the smaller droplets the printer delivers. In theory, with a 16×16 square of droplets you can attain the desired 256 grey values.

Microscopic footage of a K4 Ultrachrome print, some in homogenous grey.
A chaotic raster is used to prevent such a visible structure, as you would get in printed matter. But you do however lose a lot of sharpness: of the say 1024 droplets per centimetre that the printer can produce, you revert to 64 dots per centimetre. Printer manufacturers worked on this many years ago: more black and dark & light grey tints are used, with which you can build up the desired number of grey values using dots built up of fewer pixels. In addition, a little colour is used to compensate for the slightly off-neutral colour of the selected black pigments, and to create more nuancing. But it works better when you discount printing colours, and use a larger quantity of grey tints, whereby you also opt for a bona fide colourless black pigment that upon dilution yields grey.
Colour
Besides the three black and grey types, most inkjet printers also use a little colour to ensure a neutral rendering of the ultimate result. This could, in the long-term, result in colour differences in the prints, when one colour pigment discolours at a slower rate than the other. K4 Ultrachrome inks only use carbon based pigments that accordingly are barely affected by ageing manifestations. For truly archival black and white inkjet prints, the Ultrachrome system might just be the only solution.

A standard grey value inkjet print: lots of colour is used, and the droplets are more visible.
The software far exceeds merely solving the complex allocation of the various inks to the grey value to be printed. Due to the huge range of available inks the entire tonal gamut, from black to white, can be meticulously printed, but the software must though accurately attune the four different inks, to ensure 100% concordance with the original. In addition, print head control by the software occurs with far greater accuracy than with the Epson driver and inks, whereby the ink droplets are placed much closer together. One unsurprising result is higher definition, besides exceptionally pure tonal rendering.
Black and white
All being well, a black and white photo should be more than just a photo with all the colour removed. Nowadays that’s the customary method, as opposed to in days gone by when you photographed on black and white film if you were aiming for a corresponding end result. Besides the two monochrome cameras available for purchase, a final result in black and white is always a choice that is made when editing the photo. One downside is that you may be less aware of the colourless end result whilst photographing. You can set your camera to a monochrome image style if you’re looking to make an impact with the end result. But the RAW file always contains the colour data which still allows you to retrospectively tweak the tonal gamut to how you want it. This does not make it easier to see beforehand what the end result will be.
Style and nostalgia
One interesting question is whether black and white offers more possibilities nowadays for a ‘personal’ style, as opposed to working with colour. Due to the greater reach from reality, some edits become less noticeable, which makes them easier to apply than in colour. Yet, what nowadays is seen as the end result, is frequently highly exaggerated, with overstated contrasting, and dark areas made fully black. At photographic competitions, such as the WPP and ZC, debate rages about when significant edits such as these actually impact deletion of information from the photo, which in turn is against the rules. All whilst final result checking is far more in-depth than before, which in fact means you can use more subtlety. Very dark needn’t be pure black; very light needn’t be brilliant white.
If you’ve made a print at Profotonet on matte paper you must also give up all your nostalgic notions about old chemical prints, which might not be all that easy with black and white. Matte paper was always the exception rather than the rule in the dark room, due to its relatively limited attainable coverage, often yielding a slightly bland result. But the contemporary method also yields beautifully robust black on matte paper, with the added bonus that it’s never lustre-impeded. A contemporary black and white photo on matte paper with a fully-managed tonal gamut will be the result if you’re on top of everything.
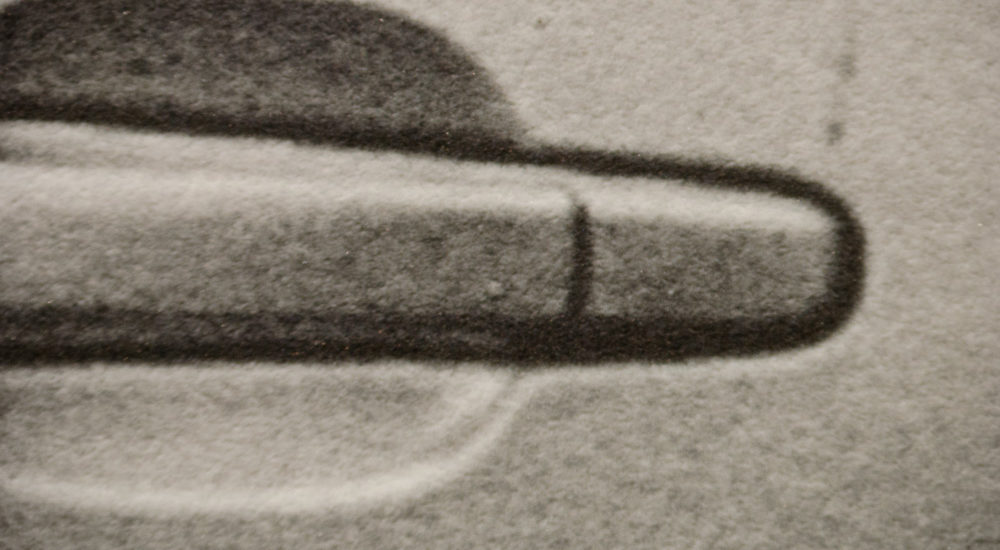
A detail from a shot taken with a Leica Monochrom, printed on A4. The whole photo is shown below. All microscopic shots have been taken with the same enlargement.

Footage taken with the Leica Monochrom, the detail above is a handle on a car door.


